You will remember your first leopard for the rest of your life. The question is whether you will also have the photograph to prove it — sharp, beautifully lit, and worthy of a frame on your wall. A safari is one of the few trips where the images you bring home can genuinely match the experience, but only if you arrive with the right gear, the right settings and a plan for the light. This safari photography guide gives you all three, written for real travellers rather than full-time professionals.
Whether you are carrying a top-end mirrorless rig or a single bridge camera, the principles are the same. Get close, get the light right, get your settings dialled in before the action starts, and put yourself in the places where great images happen. Here is exactly how.
Do You Need an Expensive Camera?
No. This is the first thing to understand. The best camera on safari is the one you know how to use. A confident photographer with a modest superzoom will beat a beginner fumbling with a $6,000 body every time. That said, the gear does set a ceiling on what is possible, so here is an honest breakdown by budget.
Smartphone only
A modern phone takes excellent wide shots — herds of elephant, dramatic skies, lodge interiors, sundowner scenes and close encounters when an animal walks right up to the vehicle. Its weakness is reach: a lion 80 metres away becomes a speck. Use the main (not digital-zoom) lens, tap to focus, lock exposure on the animal, and shoot in your phone's RAW or 'Pro' mode if it has one. Bring a small clamp or beanbag to steady it on the door frame.
Bridge superzoom (best value)
A bridge camera with a built-in 24–600mm (or longer) equivalent lens is the smartest single-purchase for most safari-goers. One camera covers landscapes to distant cats with no lens changes (which keeps dust out), it is light, and the latest models focus quickly. This is our most-recommended option for travellers who want serious reach without carrying a kit bag.
Mirrorless or DSLR with one or two lenses
For the best image quality and low-light performance, an interchangeable-lens camera paired with a telephoto zoom (100–400mm or 200–600mm) is the gold standard. Add a 24–105mm for everything wider. This setup handles dawn and dusk — when animals are most active and light is dimmest — far better than smaller sensors.
The Lens Question (the Part That Matters Most)
If your camera takes interchangeable lenses, your lens choice matters more than the body. Wildlife is usually further away than you expect, and it moves.
Your one essential lens: a telephoto zoom
A 100–400mm or 200–600mm zoom is the workhorse of safari photography. The zoom range is the key — animals will not pose at your ideal distance, so being able to pull back for a herd and zoom in for a portrait without changing lenses is everything. On a cropped-sensor body, a 100–400mm gives you even more effective reach.
Your second lens: a mid-range zoom
A 24–70mm or 24–105mm covers landscapes, sweeping savanna scenes, elephants and giraffe at close range, and life around camp. Keep it on a second body if you have one, so you never miss a wide moment while your telephoto is mounted.
Lenses you can skip
Heavy fixed super-telephoto primes (a 600mm f/4, for example) are spectacular but expensive, hard to handhold from a moving vehicle and inflexible. Unless you are a committed bird or wildlife specialist, a quality zoom serves you far better. Leave the tripod at home too — a beanbag over the vehicle door is more practical.
Camera Settings for Game Drives
Wildlife photography is about being ready before the moment arrives. Set your camera up in camp each morning so that when a cheetah breaks into a sprint, you are already shooting. Here is a reliable starting point.
Exposure mode
Use Aperture Priority (A/Av) or Manual with Auto ISO. Set your aperture around f/5.6–f/8 to keep the animal sharp while softening the background, and let the camera manage the rest. Manual with Auto ISO gives you the most control: you fix shutter speed and aperture, the camera floats ISO to nail exposure.
Shutter speed
This is the setting that makes or breaks safari images. Use 1/1000s or faster for any movement — a walking lion, a bird, a running antelope. For birds in flight, push to 1/2000s or higher. For a still portrait of a resting animal, 1/250s is fine. When in doubt, choose faster: motion blur ruins more safari photos than anything else.
ISO
Do not fear high ISO. The best sightings happen at dawn and dusk in low light, and a sharp image at ISO 6400 beats a blurry one at ISO 400. Modern cameras handle noise well, and a little grain is easily cleaned up later. Set Auto ISO with a sensible ceiling and let it work.
Focus
Use continuous autofocus (AF-C / AI Servo) so focus tracks moving subjects, and switch on back-button focus if your camera supports it — it separates focusing from the shutter and transforms your hit rate. Use animal-eye detection if your camera has it. Focus on the eye; a sharp eye makes the whole image work.
Format and drive
Shoot RAW (or RAW+JPEG) for maximum editing latitude, and use continuous burst mode in short, controlled bursts to catch the peak of the action — the yawn, the leap, the head-turn.
Composition & Light
Great safari images are made by light and timing as much as by gear.
Shoot in the golden hours
The hour after sunrise and the hour before sunset give warm, soft, low-angled light that is kind to fur, feathers and landscapes — and that is exactly when game drives run and animals are most active. This is the single biggest reason morning and late-afternoon drives produce the best photographs.
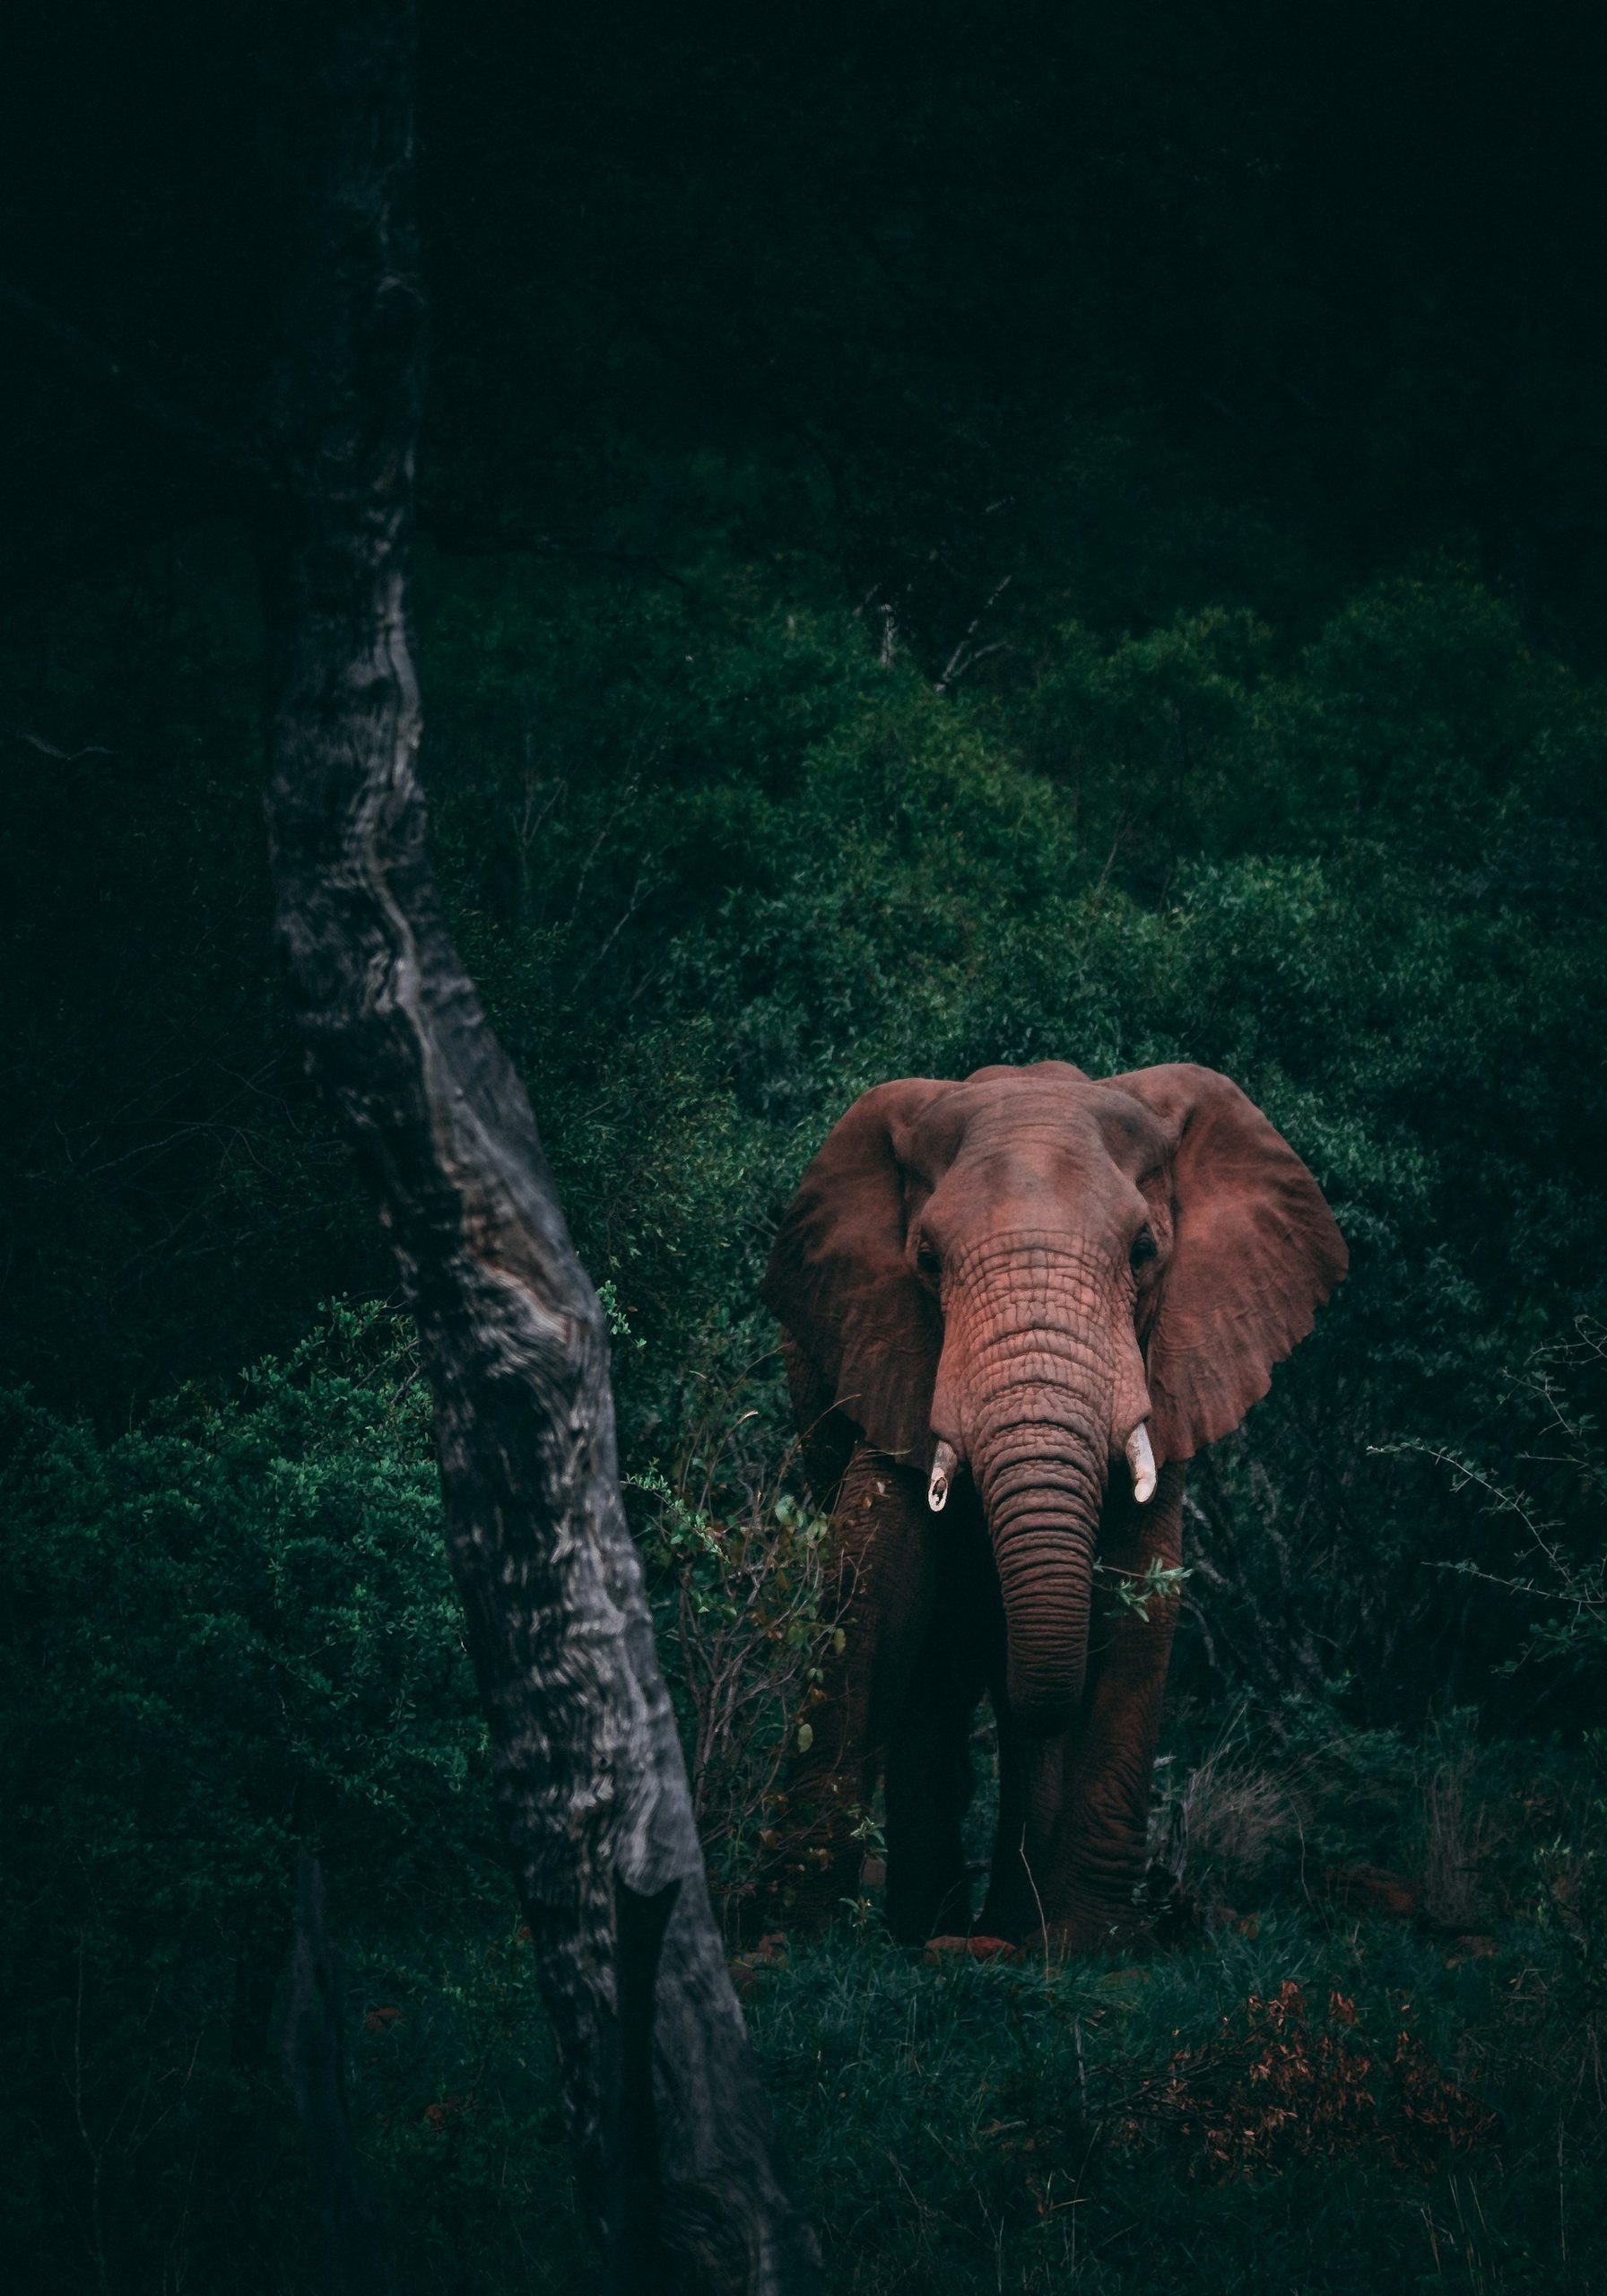
Get to eye level
Lower is almost always better. Shooting down on an animal flattens it; shooting at eye level creates intimacy and a clean background. This is why sunken photographic hides at waterholes are so powerful — they put your lens at water level for once-in-a-lifetime perspectives.
Mind the background and the eyes
A cluttered background ruins an otherwise great shot. Ask your guide to reposition for a cleaner angle — good safari guides understand this instinctively. Keep space in the frame in the direction the animal is looking or moving, and always focus on the eye.
Tell a story
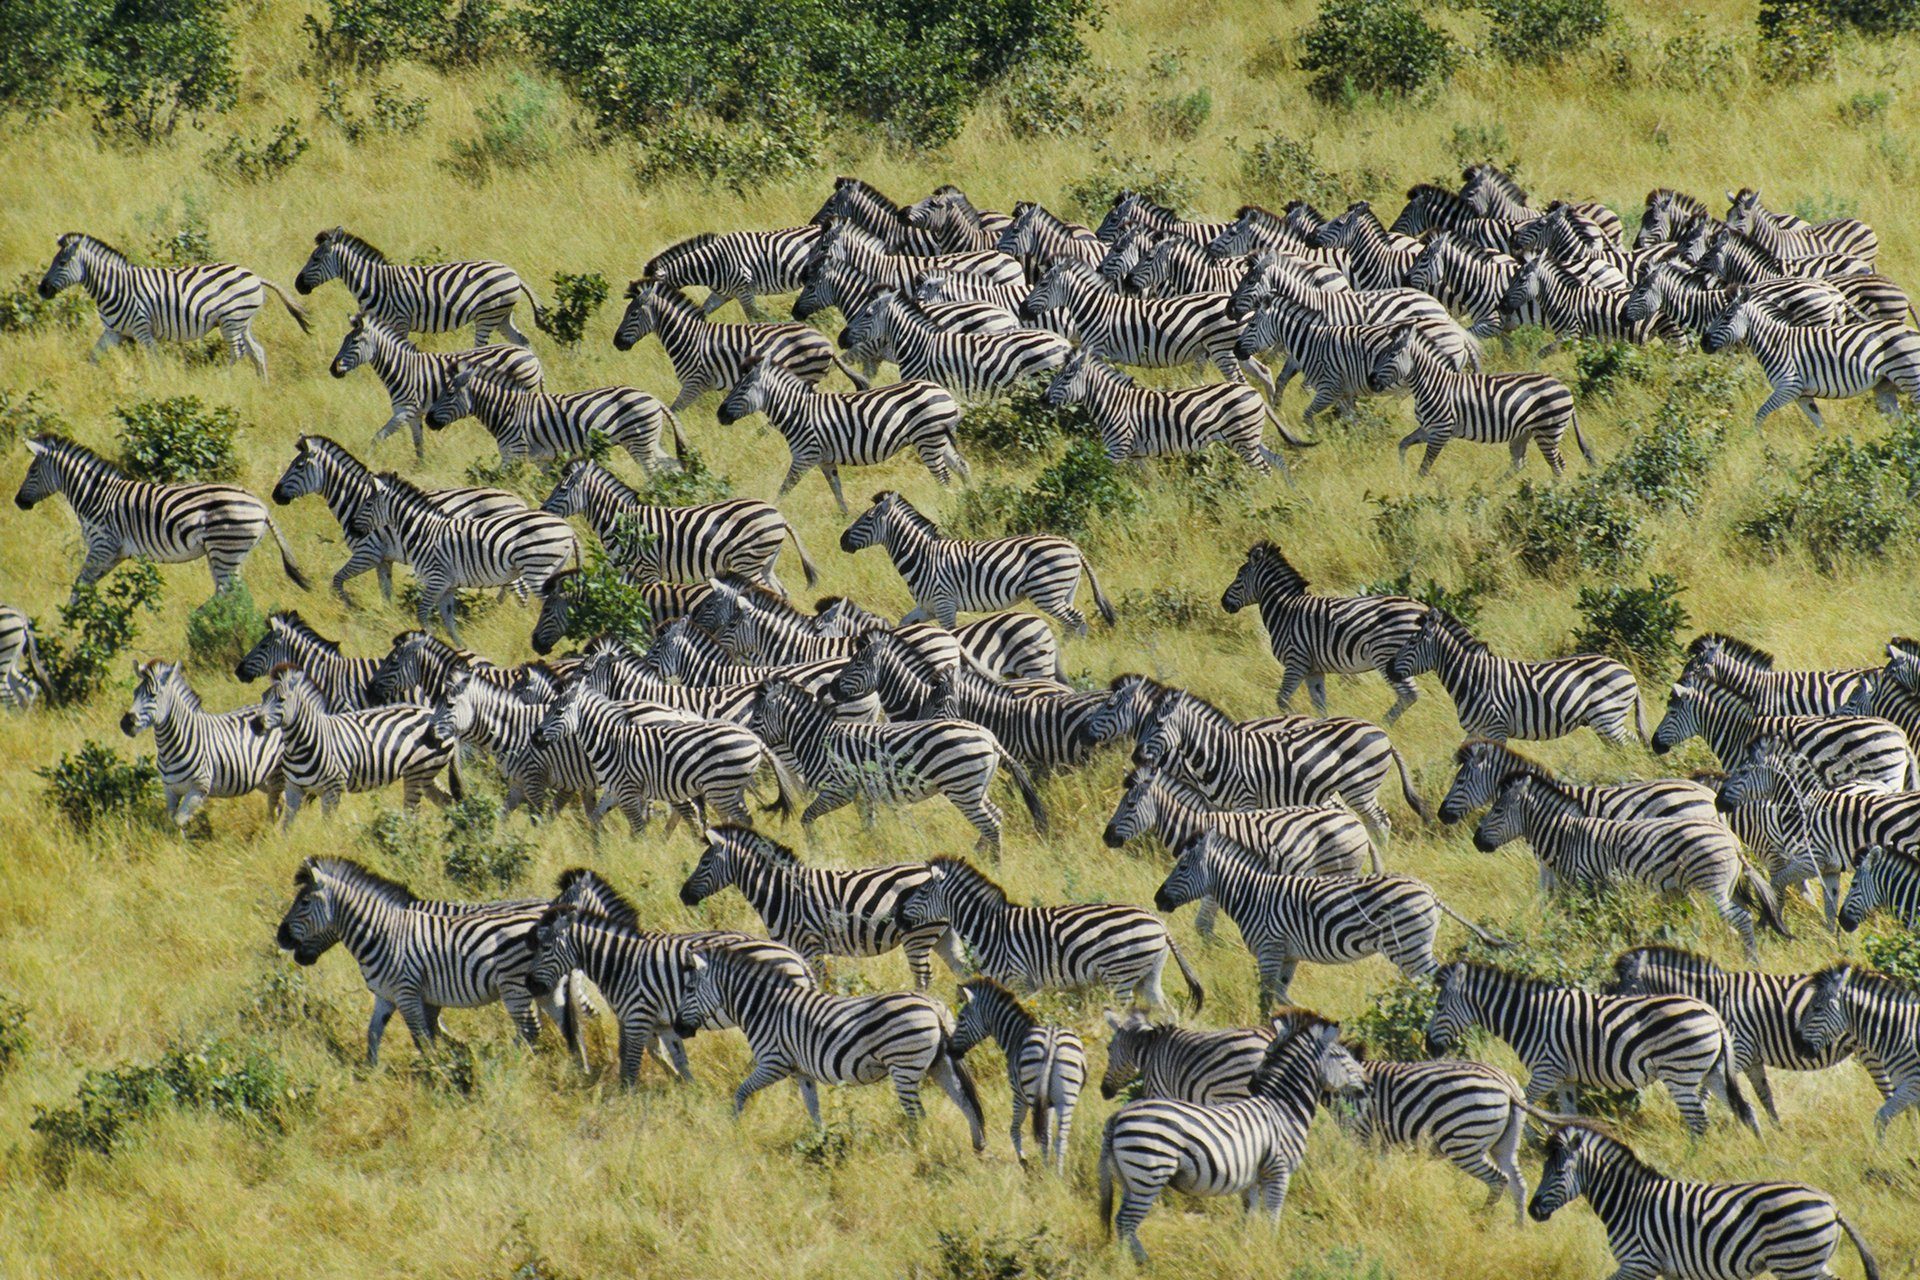
Mix your tight portraits with wider 'animalscape' shots that place the subject in its environment — a lone elephant under a vast Delta sky, a leopard draped in a marula tree. These context shots often become the favourites.
The Best Destinations for Safari Photography
Where you go shapes the images you bring home. Here are our top picks by what they deliver.
Sabi Sands & the Greater Kruger — big cats up close
The finest leopard photography on earth, plus lions, elephants and off-road access that lets your guide position the vehicle for the perfect angle and light. The private reserves allow off-road driving and night drives, both gold for photographers. See our Kruger vs Sabi Sands guide to choose between them.
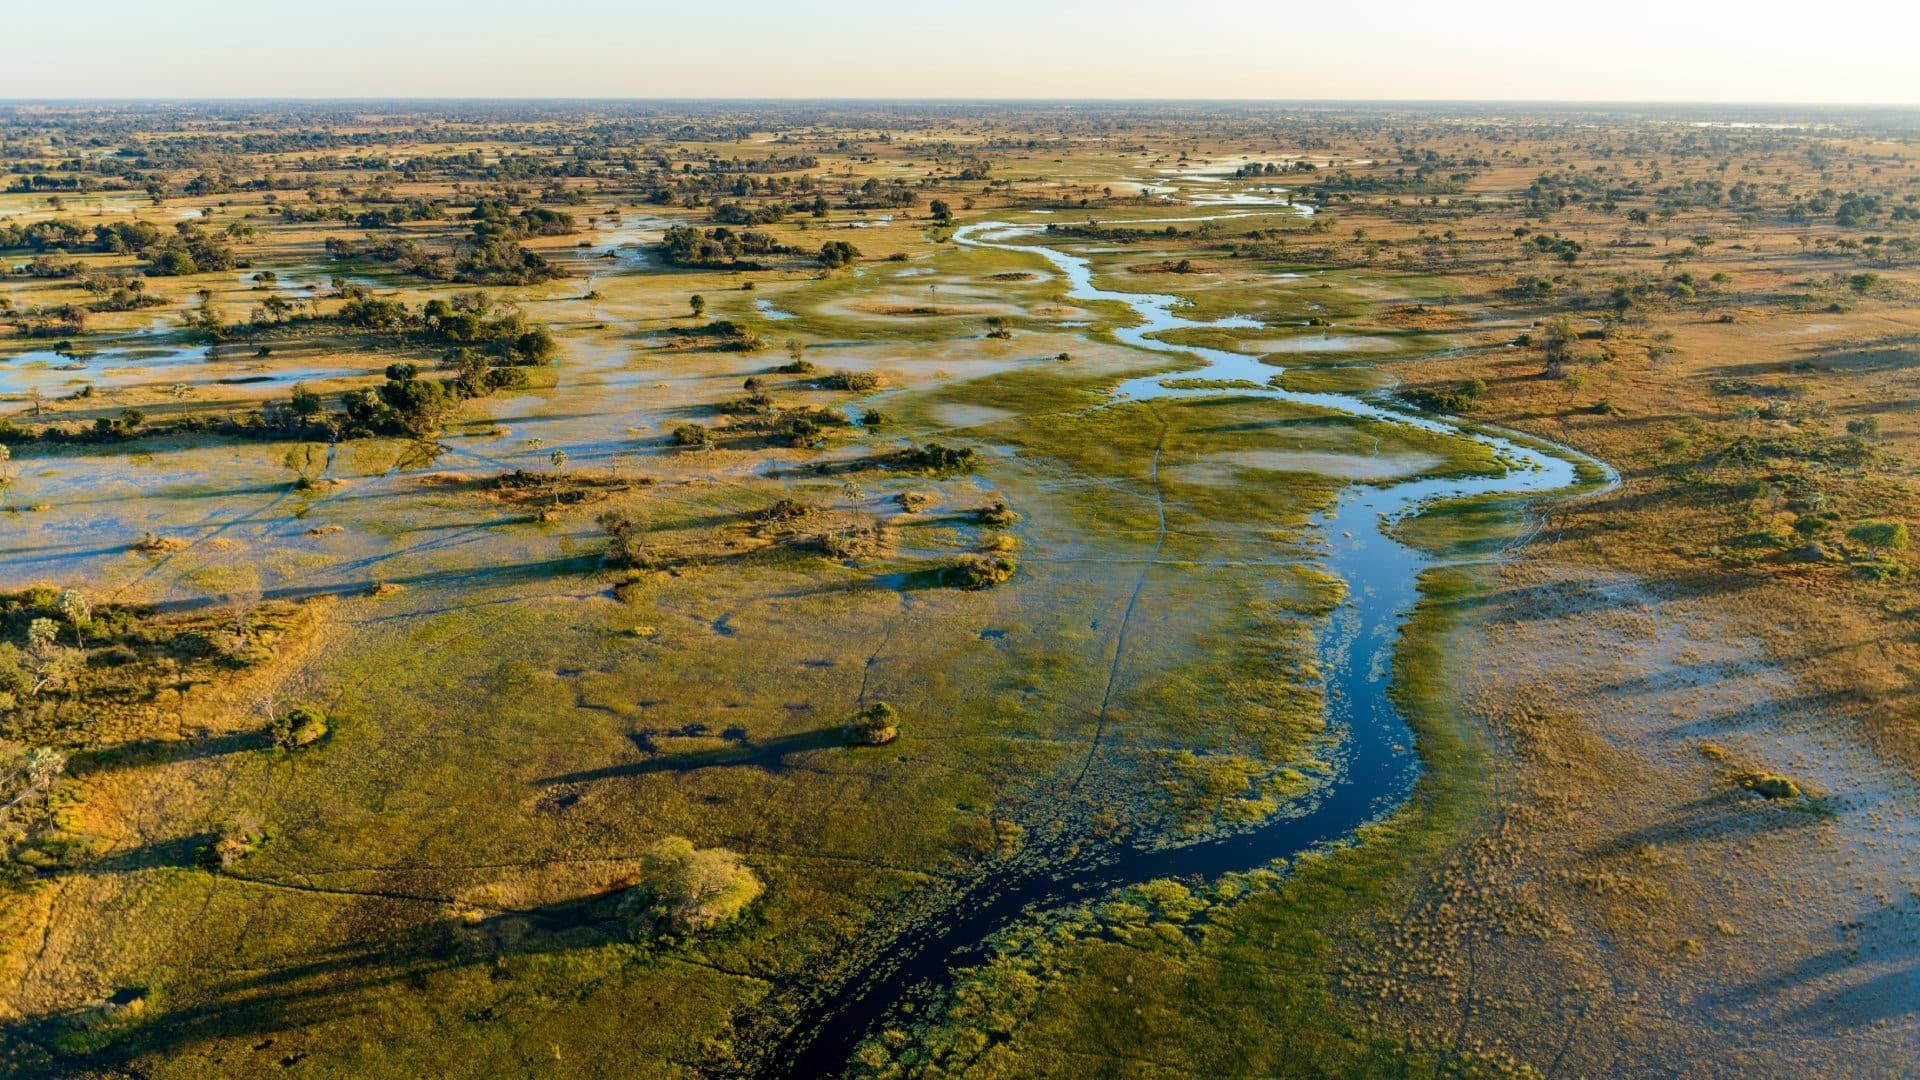
Okavango Delta — water, reflections and drama
Botswana's Delta offers elephants crossing channels, reflections at golden hour, and big skies. Helicopter doors-off flights deliver aerial images you cannot get anywhere else. Read our Okavango Delta safari guide.
Serengeti & Masai Mara — the Great Migration
The world's greatest wildlife spectacle: river crossings, dust, predators and a million wildebeest. Time it right and you will fill memory cards. See our Great Migration guide and best time to go on safari.
South Luangwa & Zambia — walking and leopards
Zambia is the home of the walking safari and one of Africa's best leopard destinations, with low-density camps and superb light. Explore our private Zambia safari guide and the walking safari guide.
Photographic Lodges, Hides & Vehicles
Some lodges are built for photographers. They offer vehicles with fewer guests per row (so everyone gets a side seat and a clean angle), beanbags and camera mounts, charging points and editing space, and access to sunken hides at waterholes. If photography is your priority, ask us to book a property and a private vehicle set up for it. A private vehicle means you decide when to wait, when to move and where the light falls — the difference between good and unforgettable images.
What to Pack for Safari Photography
- More memory cards and batteries than you think — remote camps have limited charging, and you will shoot far more than at home.
- A beanbag — the best vehicle support; some lodges supply them, but bring your own to be sure.
- Lens cloths, a rocket blower and a sealed bag — dust is constant on open vehicles.
- A backup device — a phone, tablet or small SSD to offload and back up images each night.
- A rain/dust cover for your camera, and a neutral grey or khaki camera strap.
- A second body or a superzoom to avoid changing lenses in dusty conditions.
For everything else you need in your bag, see our full safari packing list and what to wear.
Quick Field Tips That Make a Difference
- Turn the engine off when shooting if you can — vibration causes soft images.
- Brace against the seat or door frame and breathe out as you fire.
- Anticipate behaviour: a yawning lion is about to move; ears-forward means alert. Your guide will read the signs.
- Shoot the quiet moments, not just the action — a cub's paw, dust in the light, a tail flick.
- Lower your ISO ceiling and slow down at midday for landscapes and detail shots.
- Put the camera down sometimes. Watch with your own eyes. The best trips are remembered, not just recorded.
Plan Your Photographic Safari
The right combination of destination, lodge, vehicle and season turns a good safari into a portfolio. We design private trips around exactly the images you want — leopards in Sabi Sands, migration crossings in the Serengeti, or reflections in the Okavango.
Explore our Photography Safari Expedition, the leopard-rich Ultimate Sabi Sands, or the Ultimate Great Migration Safari. Read our best luxury safari lodges guide for properties built around photography, or get in touch and we will design a trip that brings home the images of a lifetime.